New Hexographer Feature: Convert Map
Hexographer just got a new feature: Converting a map (or really any PNG image) into a hex map! This is designed to make it a little easier to create a hex map based on another map you’ve created or scanned.
To use the feature:
- On the Hexographer setup screen, choose the file on the PNG image using the “Import Map” button. Then create a blank map by selecting “solid terrain” and leaving the terrain to “Blank” in the top section. Click “Generate Map”.
-
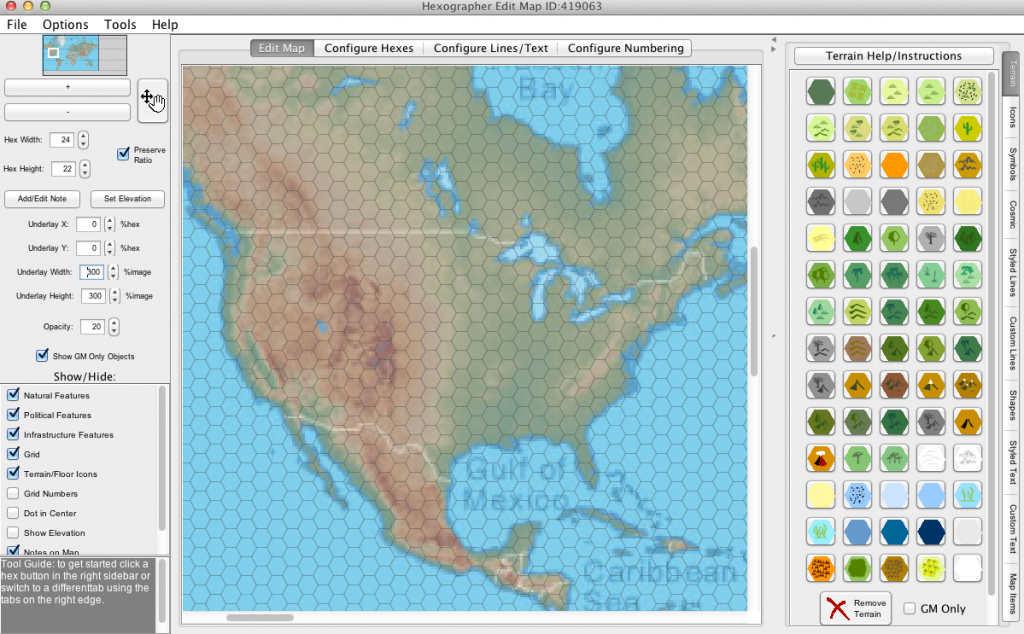
Screenshot 1: A raw map image in Hexographer’s underlay. You’ll see your map image looking a little cloudy because it is under the map you’re creating, which has an opacity of 20%. (See the left sidebar.) Re-size and reposition the map you’re tracing using the “Underlay” controls in the left sidebar. If you have the pro version of Hexographer you can also add or subtract row & columns of hexes using the Tools’ menu’s “Expand/Shrink Number of Hexes” option. If you’re using the free version and want to change the number of hexes that is still easy to do at this point: close the map and tinker with the number of hexes in the map setup screen.
- Your screen will now look like Screenshot 1. Go to the Tools menu and select “Convert Underlay Map.” It will warn you about your hex terrain changing. If you click OK, you’ll get a map like Screenshot 2 below.
-
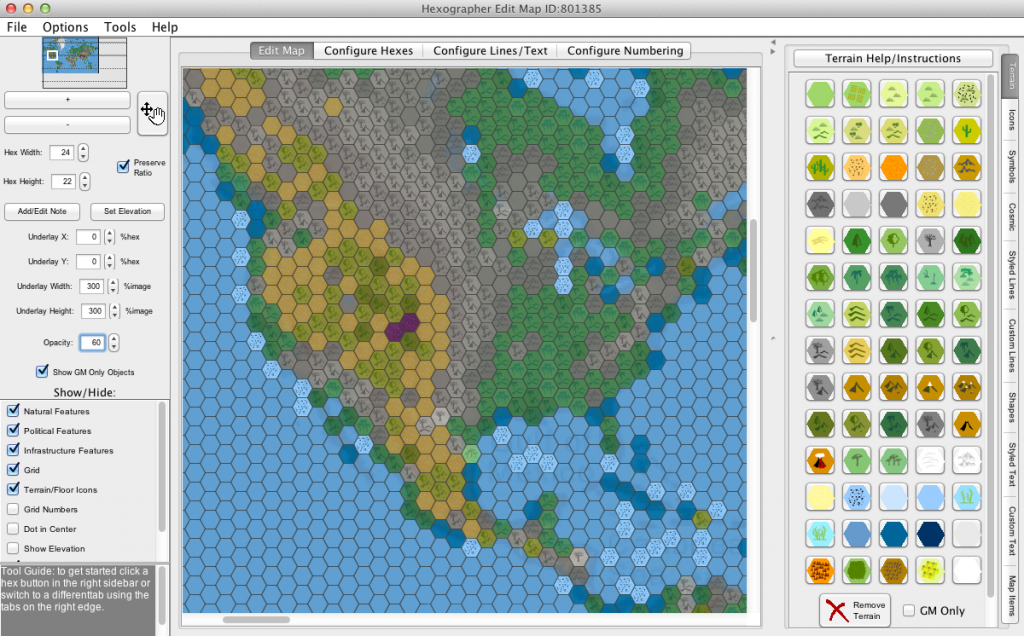
Screenshot 2: A first attempt of converting the underlay image. It has too much grey because the original map’s mountain/hill colors were closest to Hexographer’s dead forest and related terrain. This map (screenshot 2) has a lot of dead forest and other incorrect terrain. (Increase the opacity in the left sidebar to see your map better.) The method used to convert the terrain is to pick a pixel in the image under the hex and find the terrain type in Hexographer with the closest background color. If the map is using much different colors than Hexographer’s default colors, a lot of the terrain will be incorrect. To fix this, go to the “Configure Hexes” tab and change the RGB values for the background colors of the affected terrain. (Click the color chooser for the terrain type and switch to the “RGB” tab. You can get the RGB value of the dead forest (for example) write those three numbers down and change it to something very different. Then click the color chooser for the terrain you want to be there and set the RGB values to the old dead forest’s values. Don’t forget to click “Apply” on the bottom of the Configure Hexes tab when you are done.
-
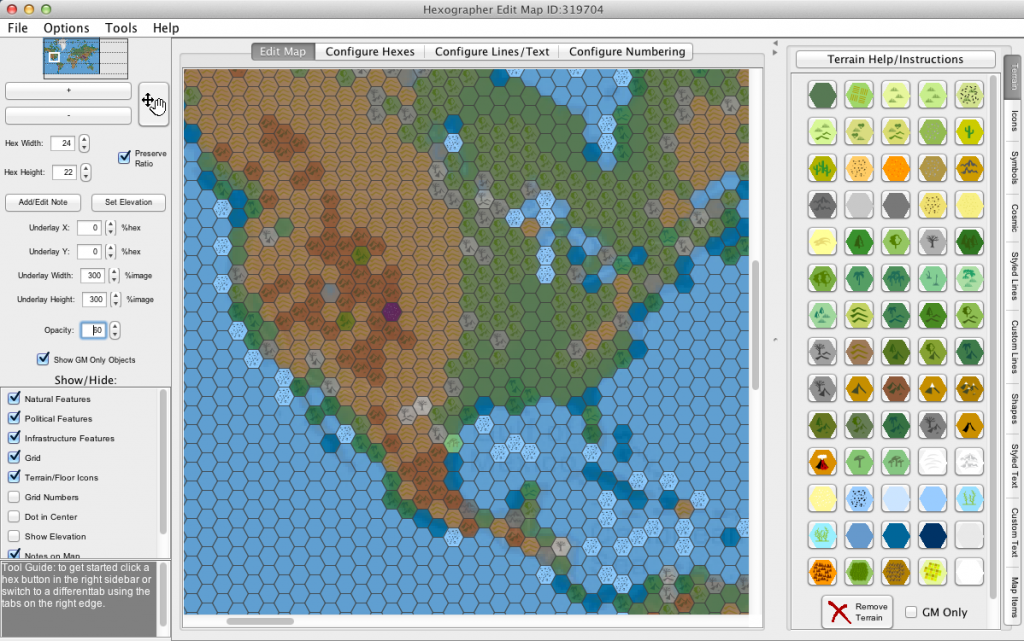
Screenshot 3: After revising some RGB color values, we reconvert. Repeat the color changing process for the terrain types giving the most issues and then rerun the conversion and you’ll get something like in Screenshot 3.
- Of course no automation is going to be perfect, so hand edit any remaining terrain that is a problem.
Very cool. Can’t wait to give it a try.
The things you do with this program are wonderful, and I just wanted to thank you again for writing it. I’ve actually been looking at doing this manually, were I to find a part of the world obscure enough that I thought my players wouldn’t recognize it.
I just converted a map and I got a bunch of ‘stars’ for terrain – any chance you can make it pick only ‘terrain’ hexes?
also, it turned the entire ocean into reefs! that isn’t such a big deal, but it is amusing.
Ray: Good suggestion… we can turn off the cosmic options for that. The reefs show up because that has a background color and it is the closest color to the ocean color of the map you are tracing. As suggested in the instructions, it is best to change the reef background color to something else temporarily.
Excellent news! Thank you. That’s exactly what I need.