Make an Icosahedral World Dice Drop Map with Hexographer
Want to use Hexographer to make a world map in a fun way? Try it with an icosahedral world dice drop map! This article walks you through it. (Or you can skip a few steps with our Icosahedral World Map Generator–which exports to Hexographer’s format, and uses a similar process, but doesn’t have the fun of dropping dice yourself!)
Note: Everything below is possible with Hexographer’s free version. Of course, we’d love your support and the Pro version has several bonus features, but the Free version does everything in this article.

Getting Started: Create the Icosahedral Drop Map
First open Hexographer and create a map that is 80×40 hexes and has solid blank terrain. (The other settings on the setup screen can remain the defaults.)
Next, go to the “Options” menu and check the “Icosahedral mask”. This puts a grey mask over part of your map leaving an icosahedral layout of your map.
Then choose “File” and “Export Current Size as PNG.” Then open your favorite image editor and crop away any grey area that is outside a rectangle shape. (Or just get the image to the right.)
Finally, use your favorite image viewer/editor to print it across 3 pages. Cut the map up into 3 pieces and print them out separately full page size if needed.
You can also try printing directly from Hexographer using the “File” menu.
The Fun Part: Dice Dropping
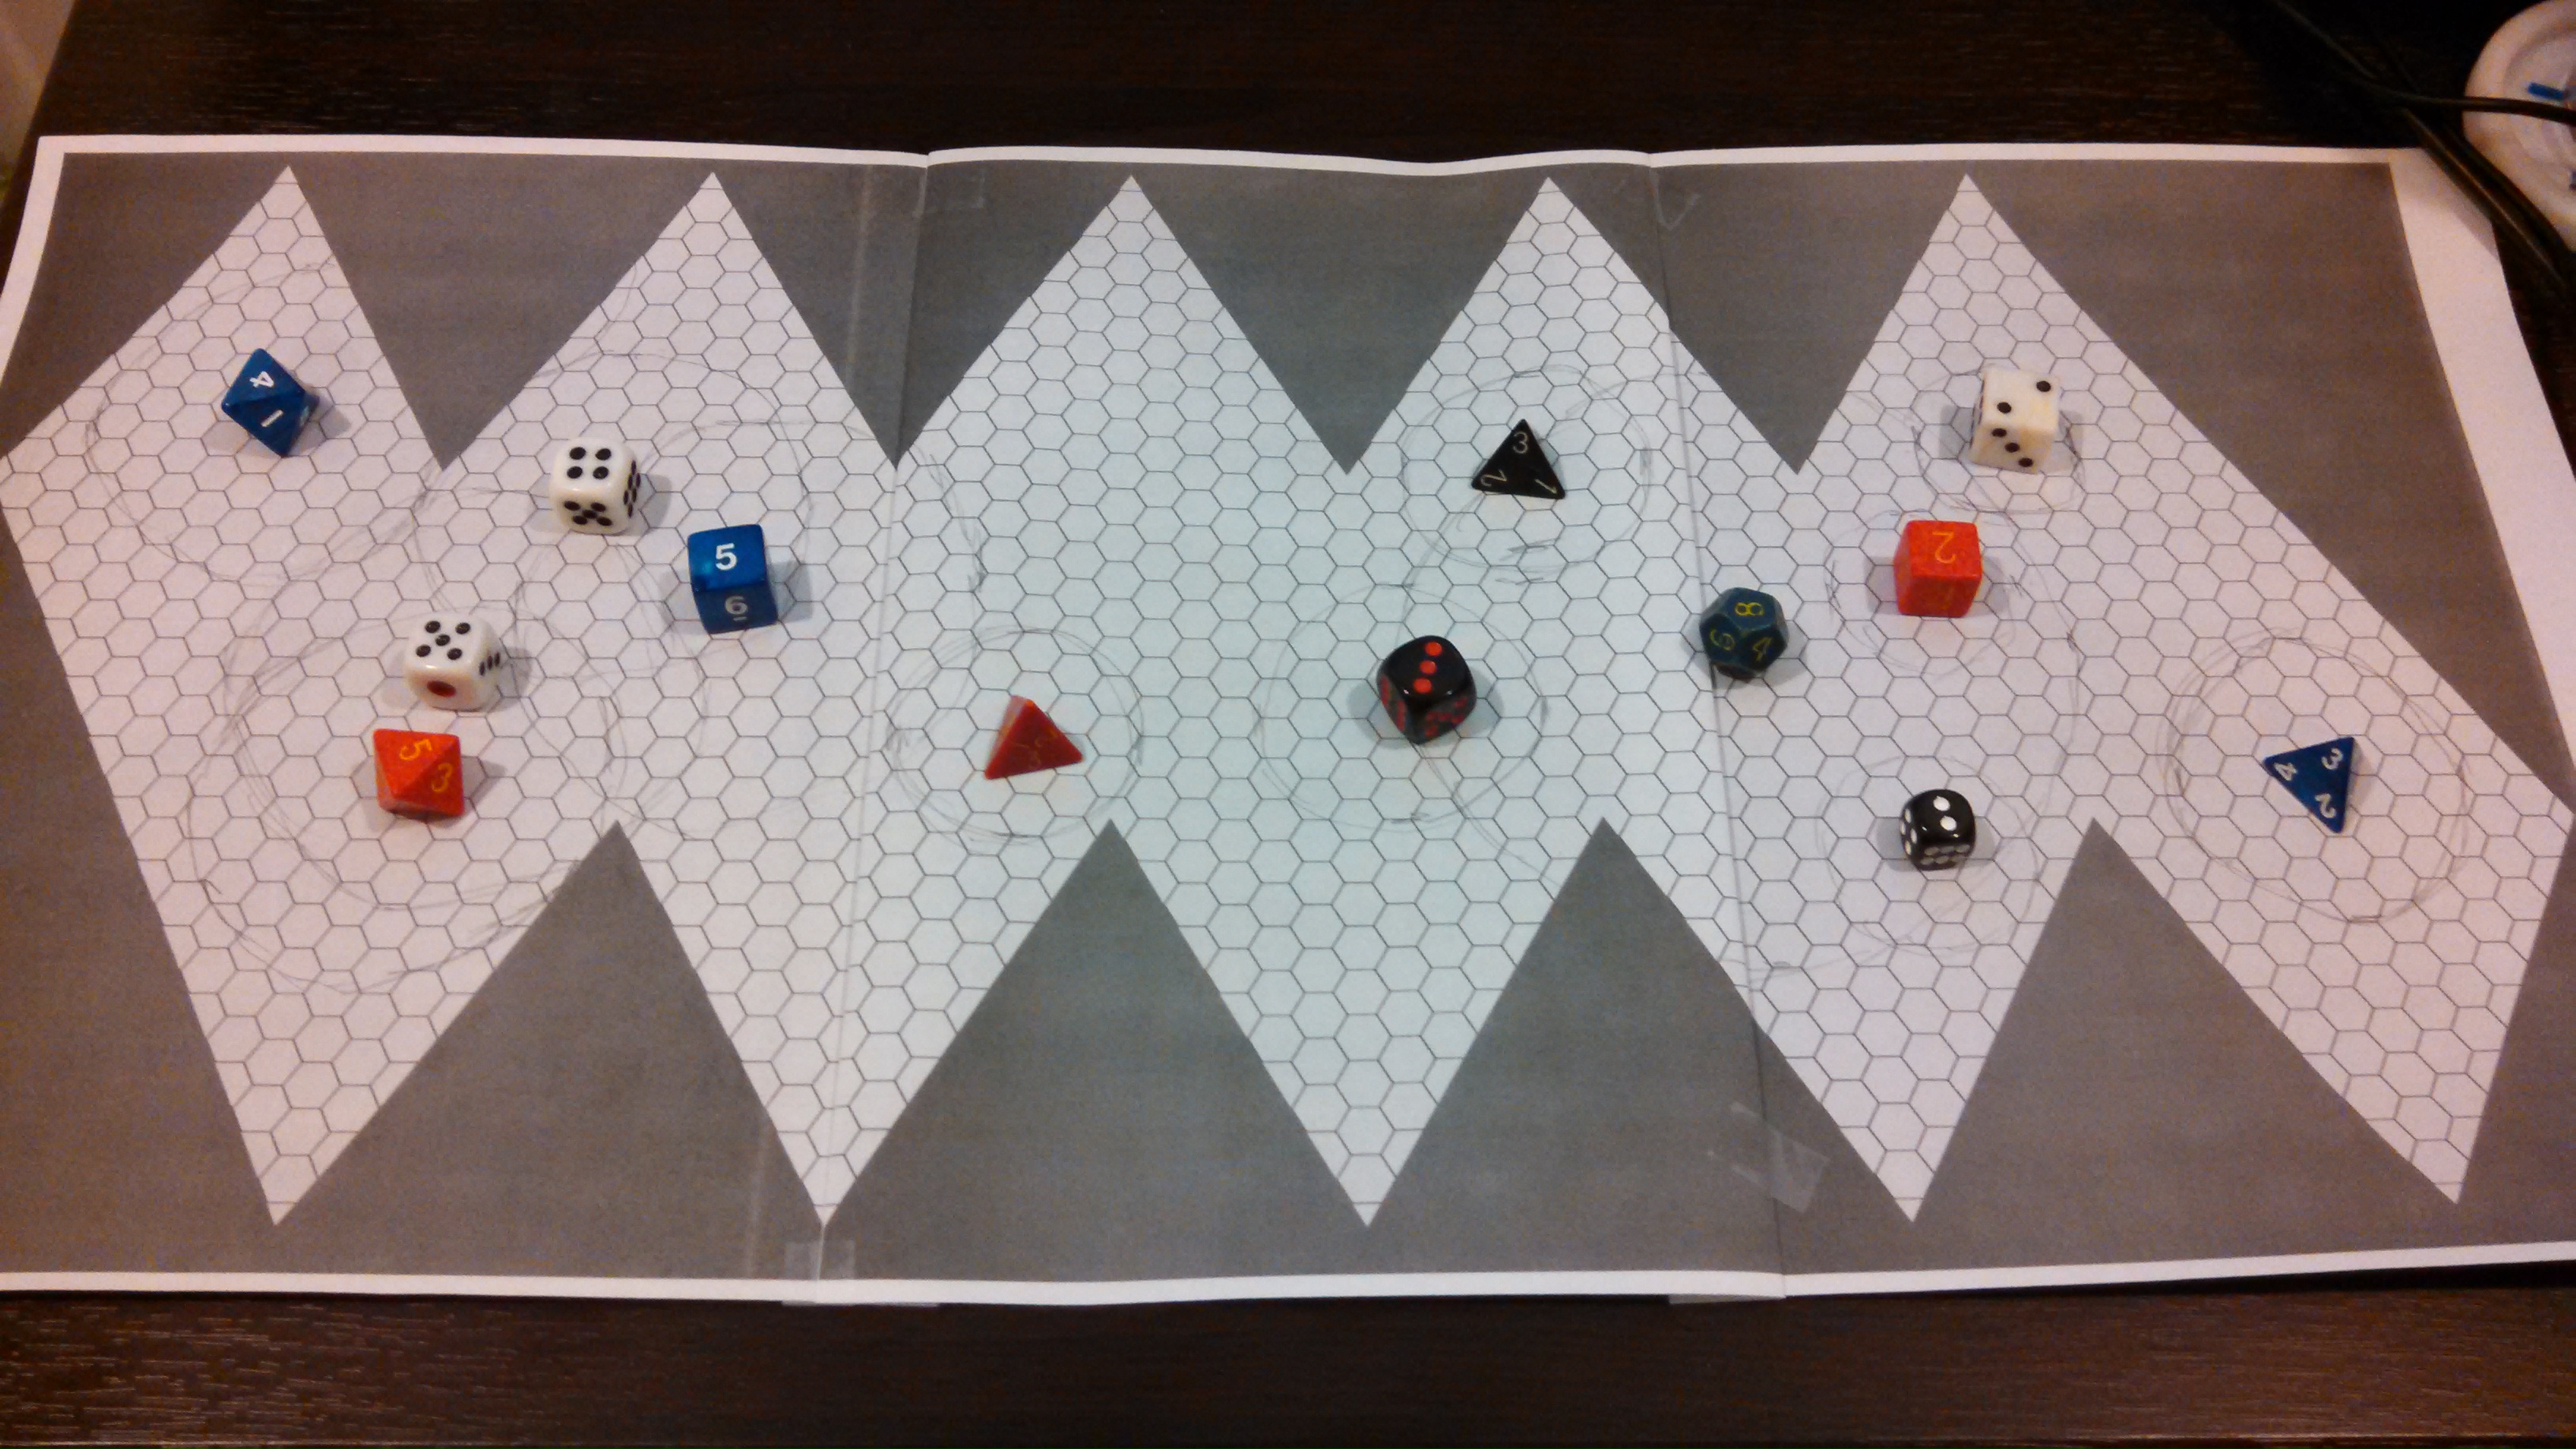
Tape the 3 pieces of map together, grab some dice (8-14?) and drop them. If they land in the grey areas or off map, re-roll.
For this map scale, d12s and d20s didn’t work very well as it would create a map that was almost all land–but if that’s what you want, use them!
Trace a circle around each die that is has a radius in hexes equal to the number on the die. Now imagine how this will turn out: any area in one circle will be flat landmasses (initially); land in areas where two circles intersect will be hills or other medium-height land; and anything in more than two will be mountains.
Now that you can imagine how the map will look initially, consider dropping more dice. Do you have enough land? Hills & mountains? Add more dice (and trace the circles) as needed.
The Tedious Part: Make the Initial map in Hexographer
This is a bit of a tedious process, but I was able to do it in about 1/2 hour.
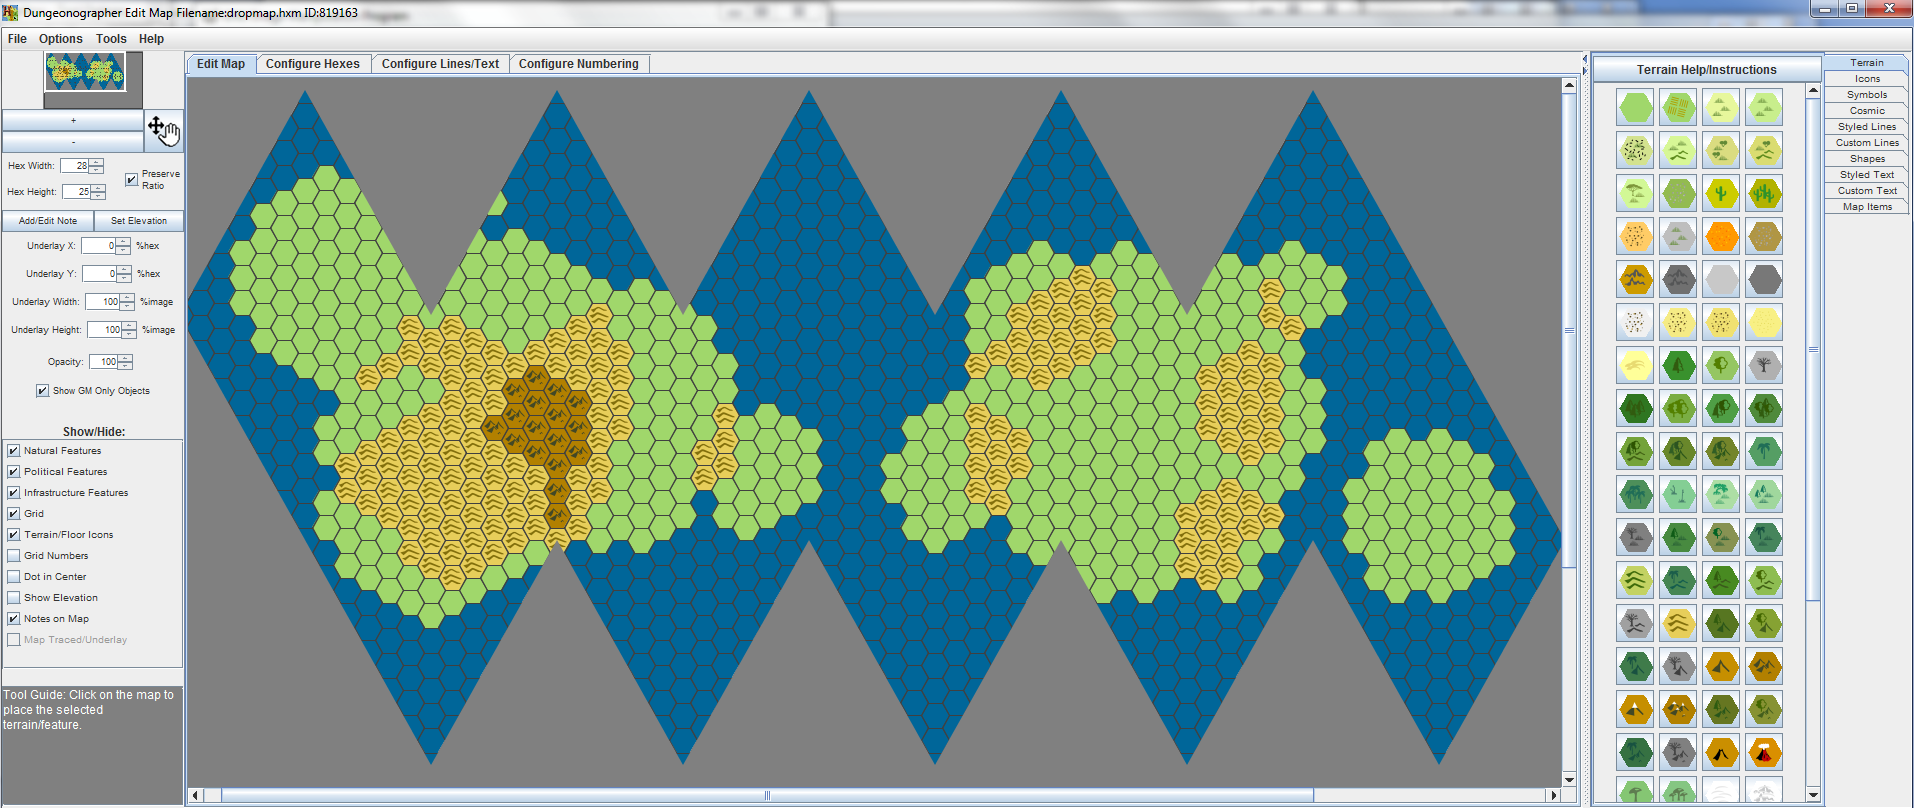
Go back to your map you created in Hexographer in the first section and choose the “Farmland” terrain type for any hex that is in a single circle. (In the “Terrain” panel on the far right, click the Farmland button (the plain green one–hover over it for a second or two to see the name as a tooltip) then click the hex on the hexes on the map.) Choose “Hills” for any area in two circles and “Mountains” for any hexes in 3+ circles.
The remaining blank area I made “Ocean.”
You’ll get a map like ours to the left.
One other point to note here: Hexographer isn’t keeping track of half-hexes on the top or bottom triangles. So if you change a half-hex’s terrain, you’ll need to adjust the other half hex on the corresponding edge of the grey area by hand.
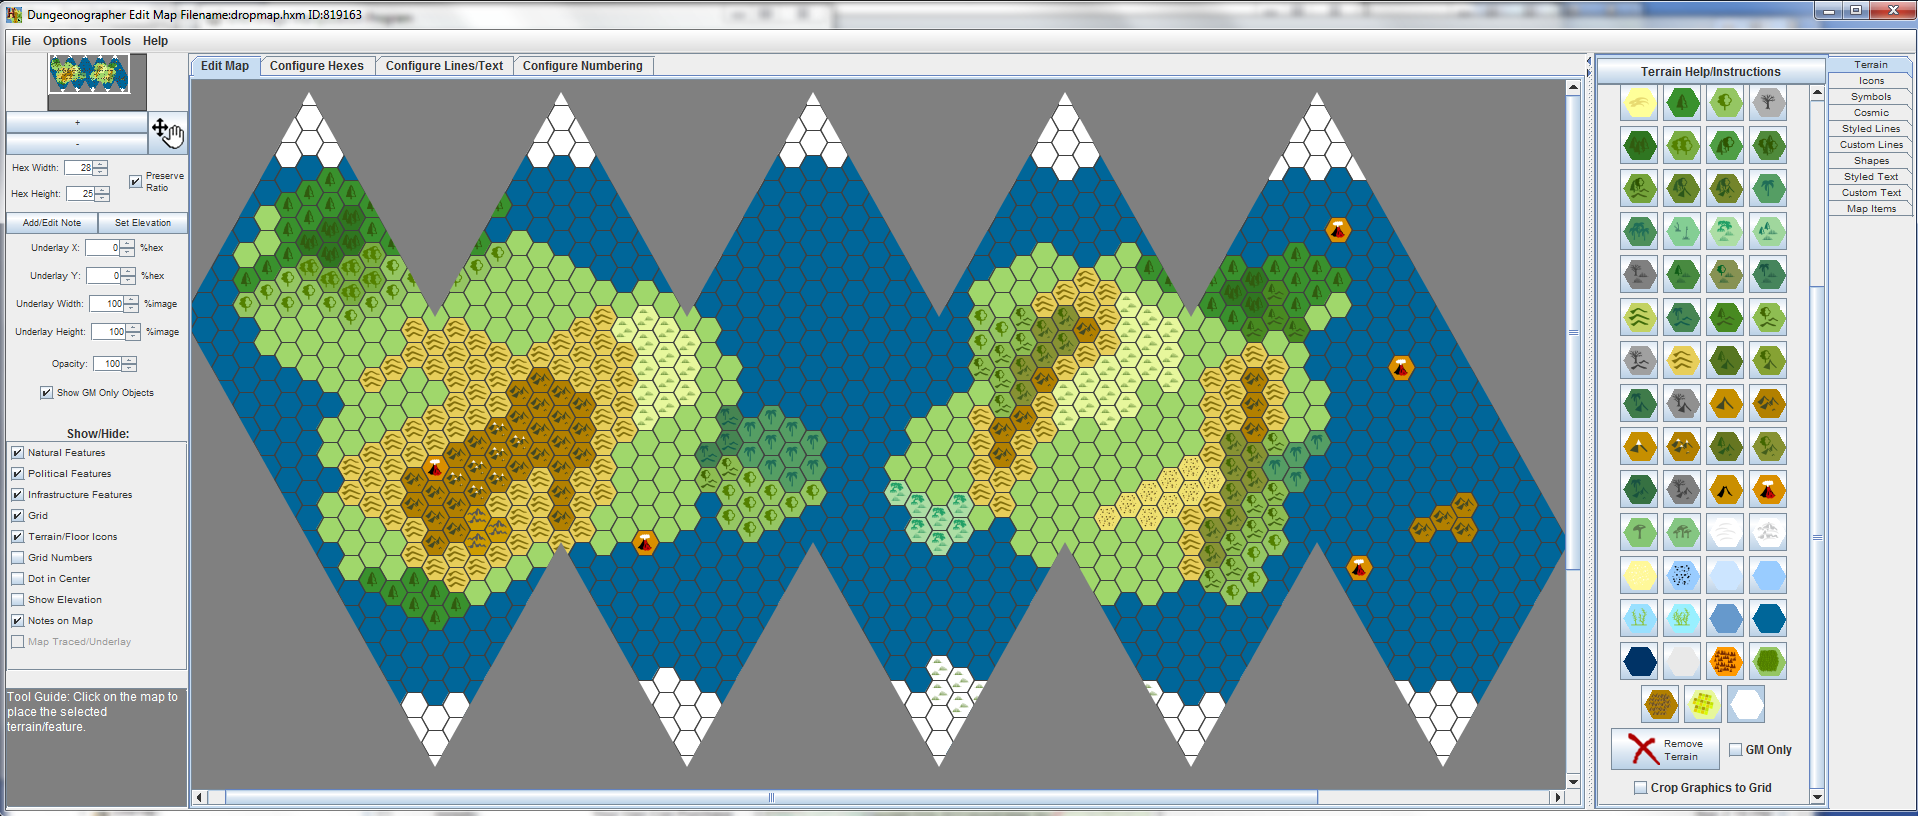
Back to Fun: Vary the Terrain
Of Course, we can’t have just those three terrain types. On the other hand, at a map at this high level, we probably don’t want to use all 80+ terrain types built into Hexographer. I suggest you stick with these, for an earth-like planet: Farmland, hills, mountains, light forest, heavy forest, forested hills, forested mountains, light evergreen, heavy evergreen, evergreen hills, evergreen mountains, light jungle, heavy jungle, maybe jungle hills, grassland, rocky desert, sandy desert and a few volcanoes.
Switch the terrain as fits your understanding of wind patterns, vegetation growth, and when you plan to have rivers (see below). Those topics are outside the scope of this article, but some web searching or an 8th-grade earth science book will help. However, three key points:
- Wind patterns vary based on lattitudes: some areas will be east-west, some west-east.
- You won’t have much vegetation on the opposite side of a mountain from the direction wind is blowing. If the wind is going east-west, there won’t be much vegetation on the eastern side of the mountains without a special reason.
- Rivers flow downhill. We’ll place rivers in our next step (although you could interchange this step and the next.) So place your rivers (and large lakes) or imagine where you’ll place them as you place vegetation.
In my map, you can see that I decided I had too much land, so I dropped the smallest landmass and left just a few mountains. I looked at my lard hill areas and decided to add mountain areas to the center of them. I also added a few random volcanoes. One is in/near high mountains, the others are hotspots in the ocean. I’ve also added polar caps. Otherwise, I mostly changed the existing land to other types for vegetation.
More World-mapping Fun: Add Rivers, Lakes
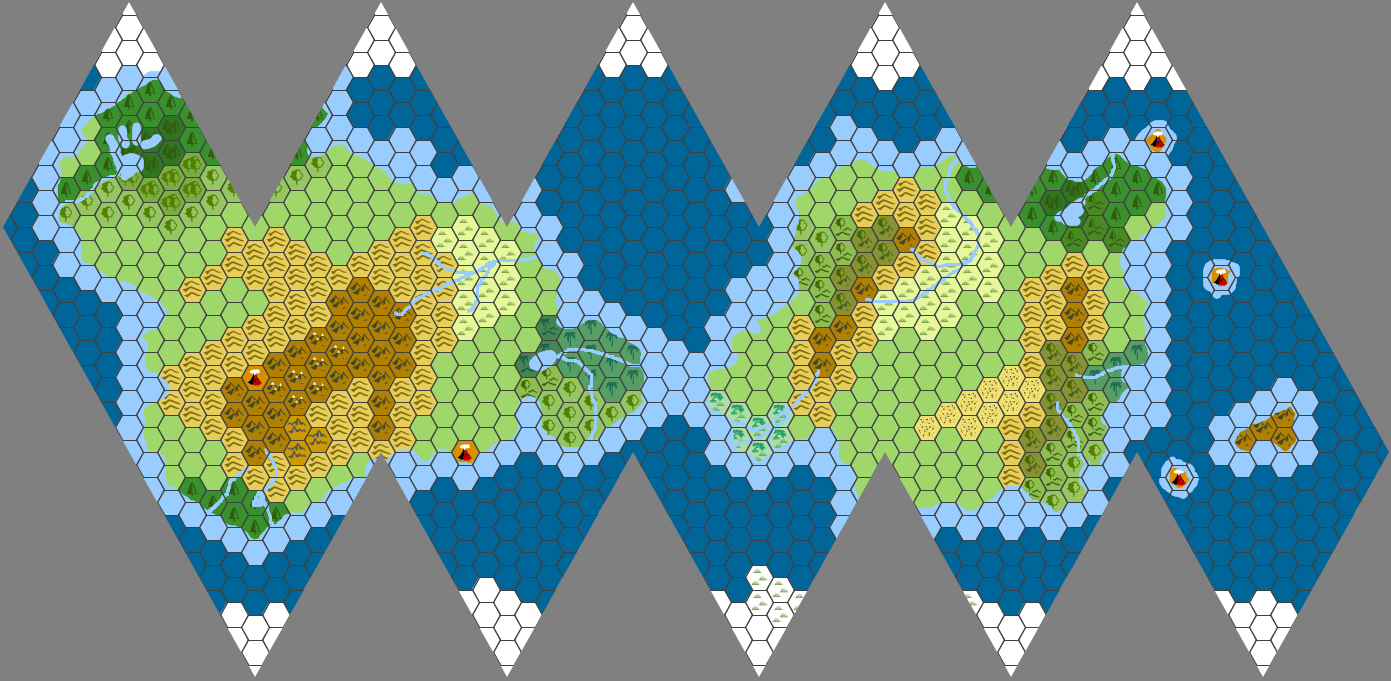
Go to the “Styled Lines” tab on the far right to pick Hexographer’s line tools. Then choose the “Freehand Rivers” button. Click and drag on the map (Or click points if you prefer) to create a river. You can do the same for making lakes. Or use the “Freehand Coastline” button for a thicker line.
I like to add a continental shelf by placing one hex of “Sea” terrain on the edge of most landmasses.
If you don’t want the landmasses to match the shape of the hexes, you can vary the terrain edge in two ways:
- Use the “Freehand Coastline” or “Freehand Sea Fill” lines to cover up part of the land hexes.
- Go to the “Shapes” tab and create a polygon of “Sea” color to cover part of the land hexes.
Next Steps
- Add Cities/castles/ruins/etc: Go to the “Icons” tab and place icons where desired. (If you don’t want the icons centered in each hex–you want them centered where you click, go to the “Options” menu and choose “Feature Placement” and select “Freeform.”)
- Add country borders: on the “Styled Lines” tab choose either “Freehand Major Border” or “Snap to vertex Major Border” depending on the look you want.